I have always wanted to make a patchwork wallpaper wall, and I finally decided to go for it. I’m so, so glad I did.
I thought I’d share our process as so many of you on Instagram and Facebook wanted to know and I think we should all have at least one wall in our homes that comes alive like this, yes?
Step One: Get inspired
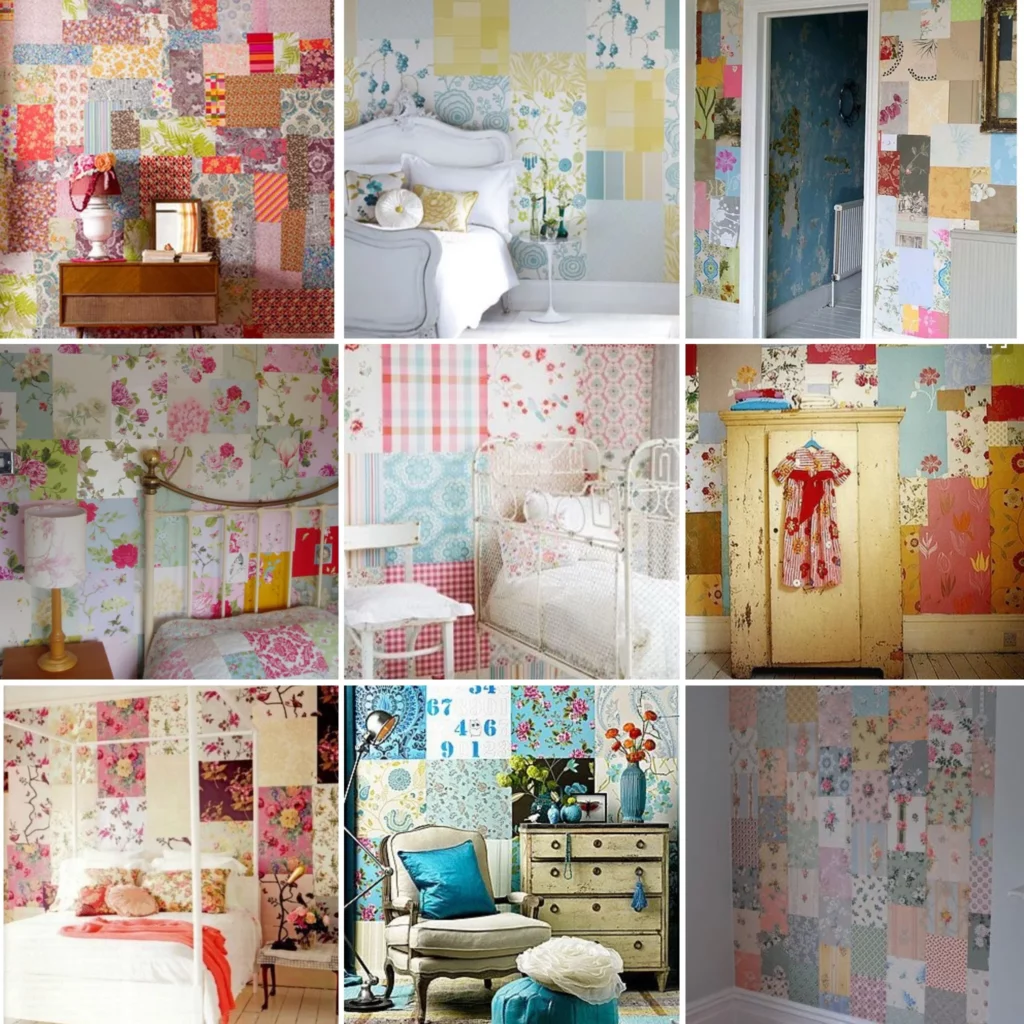
Get inspired. Head over to Pinterest and drool. Above is a great collection of wallpaper walls that I found by searching “patchwork wallpaper walls” over there. As you can see, there are many different styles of doing it. The first photo in this grid is what I used as my inspiration. I loved how it looked like a quilt for the wall with different shapes and sizes of paper overlapping one another. I also loved the vibrancy of the colors, which is how I chose my color palette.
Step 2: Gather up your wallpaper pieces

Gather up your wallpapers. I have a large collection of vintage wallpapers, but I knew I needed to round out what I already had with other papers that featured different colors. I was able to find what I was looking for on Etsy with a simple “vintage wallpaper” search.
Warning: there are hundreds and hundreds of options on Etsy. I decided to only add papers to my cart that I was drawn to (in love with) and that also included colors to go along with my chosen color palette. I didn’t worry about making definite choices at this stage. I only chose what I was in love with. When I was all done filling up my cart, I had about 35 different pieces of wallpaper (most at about $16 per yard) totaling about $500. I then refined that original selection down to about 10 choices for about $200 total. WORTH IT. In the end, between the 10 yards of various papers I bought from Etsy and the collection I already owned, I had about 25 different patterns that I would end up using on the wall.
Cut your papers. I gathered up all the papers and cut about 50 big squares (ranging from 10×12″ to 10×14″) as well as smaller squares and rectangles (ranging from 6×6″ to 7×10″). I put a large piece of cardboard down on my dining room table and simply used a box cutter and a large straight edge (ruler) to cut the pieces. I didn’t worry about being exact, but was sure I had as many large squares as I did smaller.
Step 3: Get started

Start with the bigger pieces first. I didn’t have an exact plan when I started to put the pieces up. I just knew that I needed to start with the the bigger pieces first. I started on one side of the room and slowly worked by way over to the other side of the room.
Step 4: Evenly distribute shapes and colors

Pay attention to color. As I moved from one side of the room to the next with my bigger pieces of paper, I was sure to pay attention to distributing the colors somewhat evenly so that the greens, yellows, oranges, blues were nicely balanced. I also was sure to paste some of the papers vertically while others were horizontal.
Water + wallpaper adhesive = everything. For each piece of paper we glued, we first spritzed it with water using a water bottle (you can see the water bottle we used in the photo above). We did this before applying the wallpaper adhesive because so many of these papers were brittle from their age. The heavy spritz of water helped tremendously. After we spritzed the pieces with water, we used our hands to spread the wallpaper paste onto the backs of the papers. We were sure to generously cover the edges of the papers. We used this exact wallpaper adhesive and it worked great.

Step 5: Start overlapping the smaller pieces over the bigger pieces

Overlapping = quilt effect. After you have a large part of the wall covered in larger pieces, start overlapping them with smaller pieces. This is the fun part because you can start to see the quilt effect on the wall. Using smaller pieces to fill in an area that needs a certain color is another way to achieve a nice balance of color on the wall.
Step 6: Enjoy

Delight in your one-of-a-kind patchwork wallpaper wall. I so wish I had done this years ago!
FAQ’s
What will you use this room for?
I’ll share the full room reveal and what we’ll use this room as in an upcoming post. Don’t want to miss it? Be sure to sign up over there –> on the sidebar to receive blogs in your inbox.
How long did it take?
My mom helped me with this project. From the time we started cutting squares to the finished wall was about five hours total.
Can you use scrapbook papers or other papers? What about fabric?
I’m sure you can, but you’ll need to do some research as I’ve never done it. If you have some resources or information, please share in the comments!
Did your papers come out smooth or bubbly?
It’s perfectly smooth. We found it MUCH easier to hang pieces of wallpaper vs the usual long strips of wallpaper. There are seams, of course, but that was to be expected and I love it.
Tell me what you think in the comments!

